
November 1, 2019 – Dec 13th, 2020: 1 year and 43 days from the day I paid for the SnapMaker A350, it arrived.
Their packaging is really top notch. Unboxing and assembly was straightforward and the manual was clear and easy to follow.
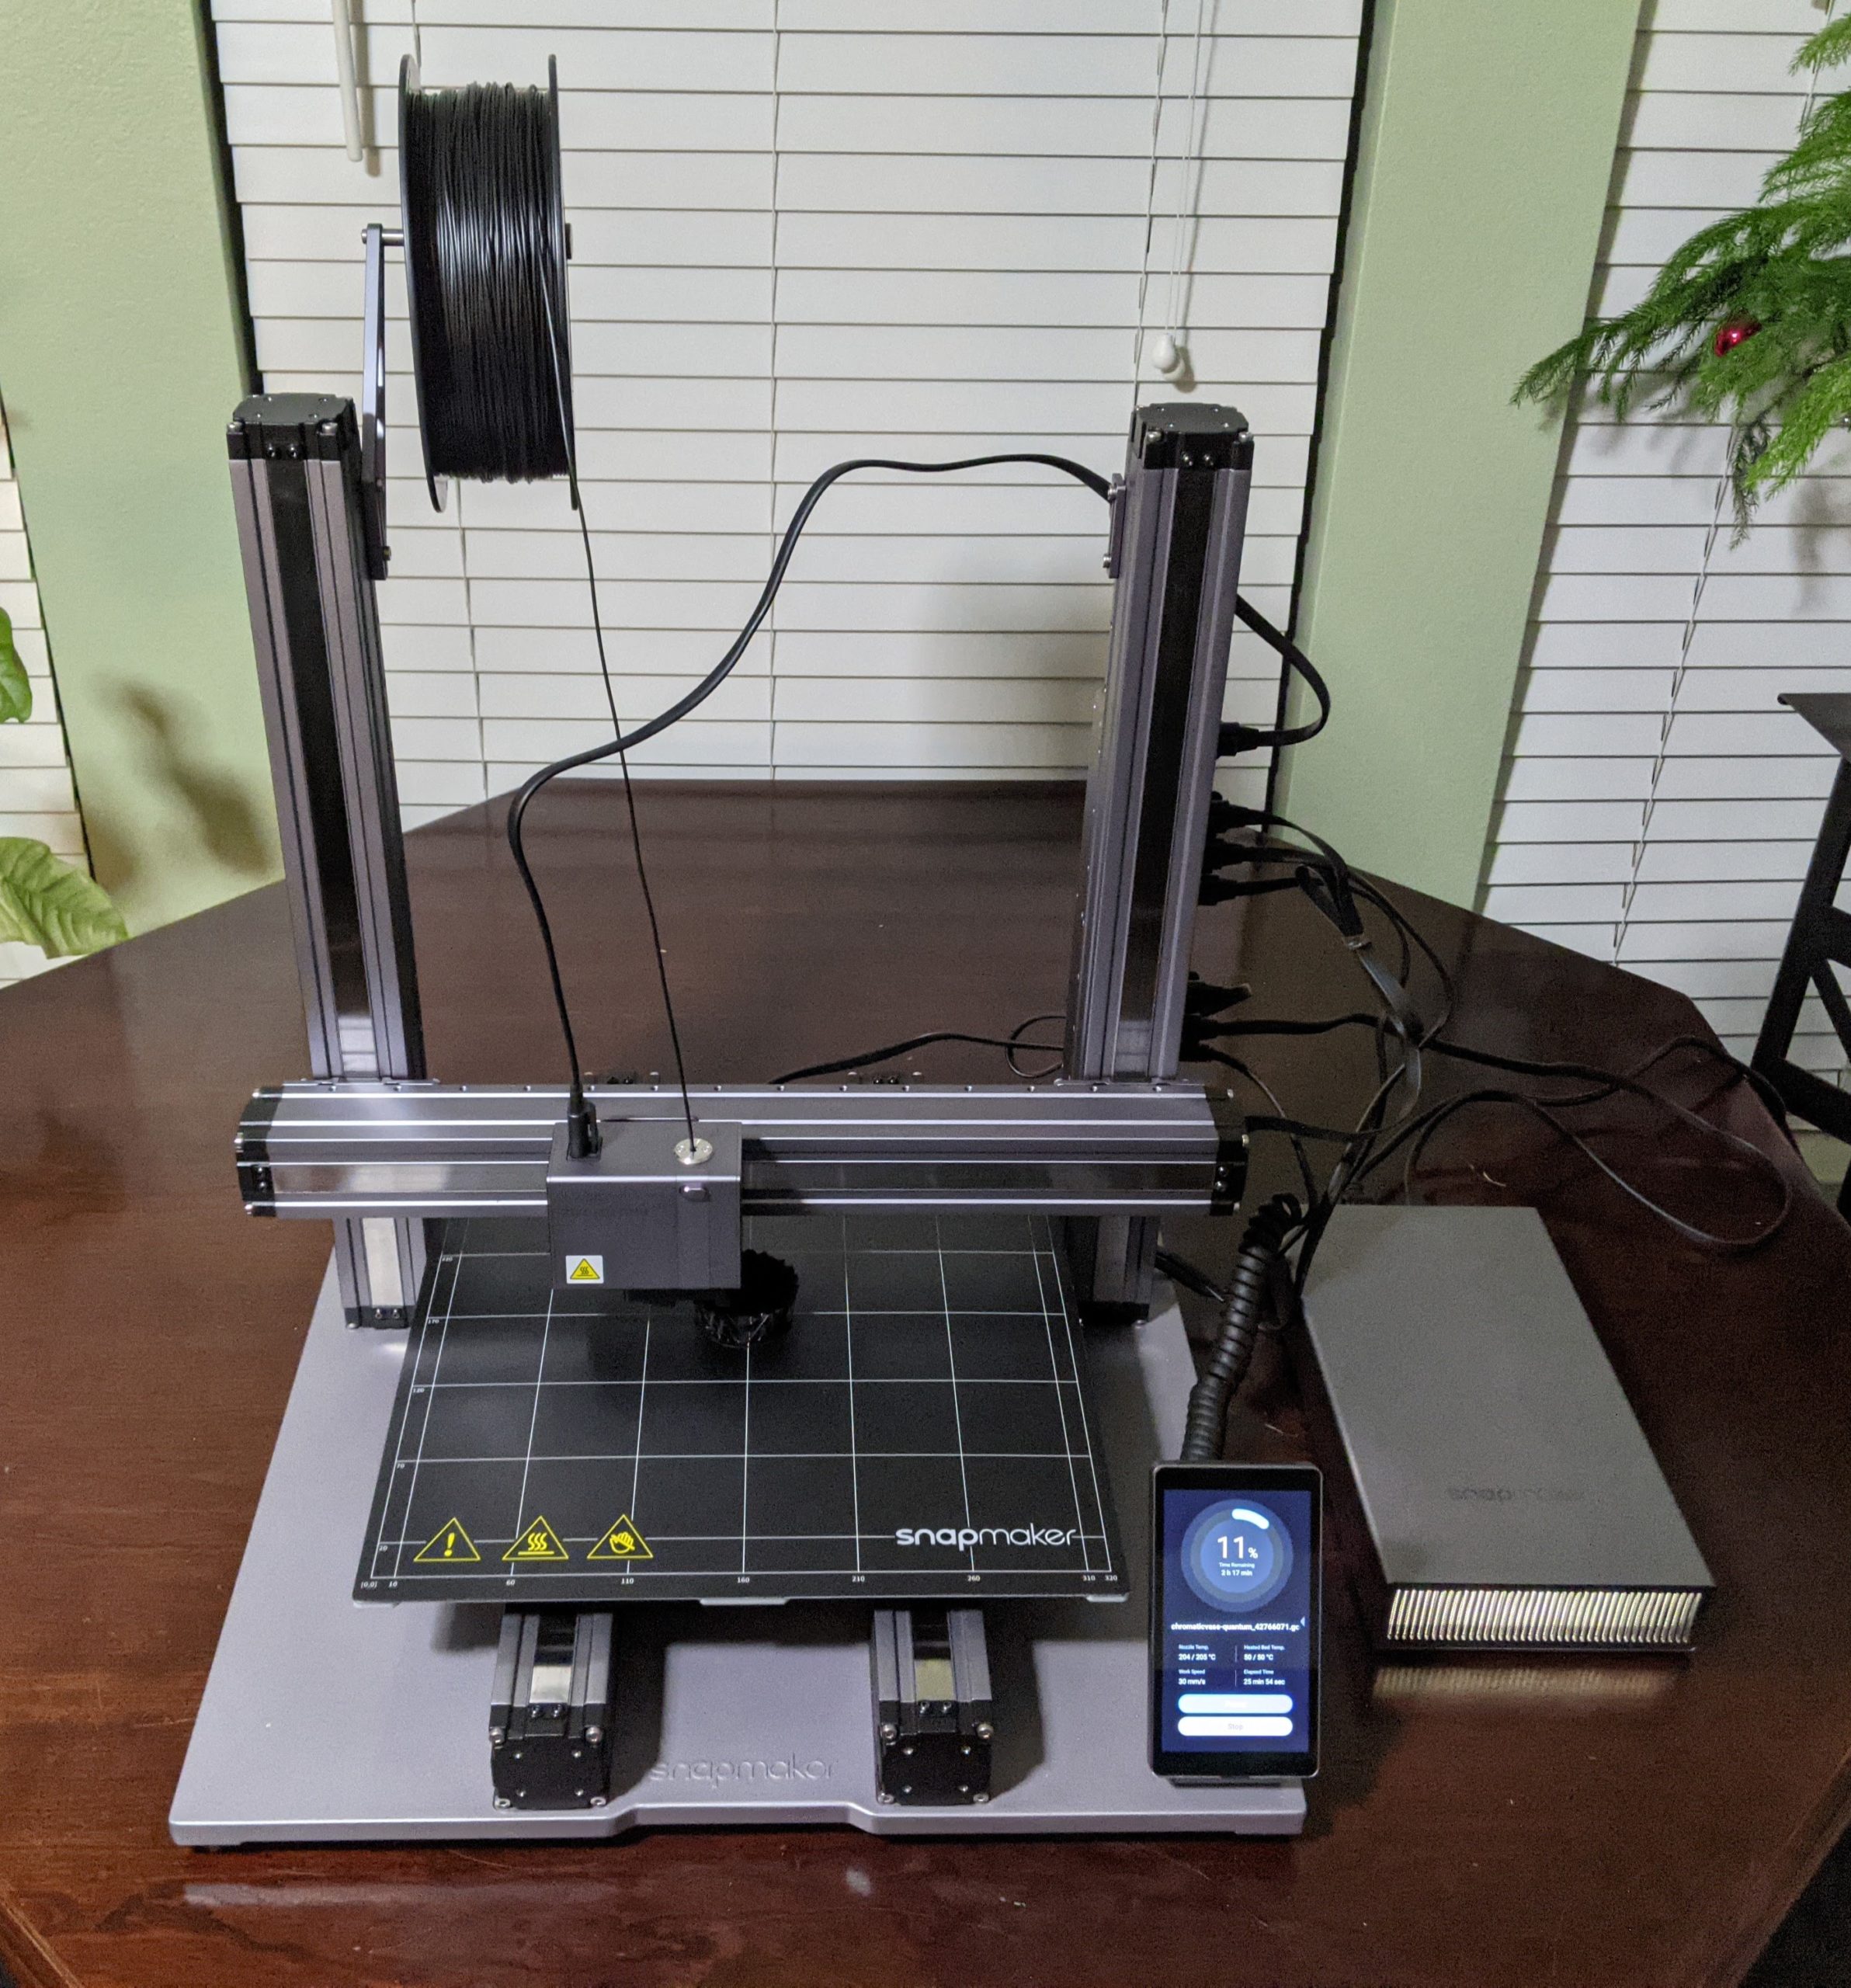
Everything about the assembly was great – the manual is clear and everything went together without any issues. So far, everything about this A350 build just says “quality” – right down to the filament holder.
I chose one of my favorites for the maiden print and used the black PLA that came with the A350.
https://www.myminifactory.com/object/3d-print-42610

After this completed, I found that the Z-offset calibration method in the manual way too low and the nozzle had pressed against the bed for the entire first layer. It left trails on the brand new surface. Not happy.
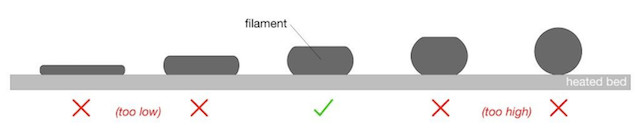
INFO: The Z-offset is the distance between the tip of the filament nozzle (where the filament comes out) and the flat surface of the bed. Too high, and you print into the air, too low and the nozzle scrapes along the top of the bed, sometimes so tight the filament can’t squeeze out. For the first layer, you want the filament to squish out out from under the nozzle just enough so that it sticks to the bed – this adhesion will be critical for the remainder of the print job.
I performed the Z-calibration per the manual once again, but this time instead of pinching the calibration card to the point of it wrinkling, I left it so that I could just feel it bump the nozzle as it went under. If you have calibrated any other printer, you should know that this is already way too high and you will not get good first layer adhesion.
Surprisingly this was still too low and scraping the bed! I was angry. I had waited so long for this thing but perhaps I was expecting too much?
When I came back to the A350, I focused on the Z-offset. I planned to start high enough that I was printing into thin air, then half the distance of the nozzle to the bed each iteration until I got it dialed in. My starting point each time was to let the nozzle pin the calibration card to the bed. Not tight! Just enough so that I can slide the card easily underneath but still feel it bump the nozzle as it slides under. I went up .5mm and as expected, it printed into thin air. That’s a success because at least it didn’t scrape up my brand new print surface again!
Each time, I halved the distance … from .5mm to .25mm. At .25mm I had adhesion but not much “squish” (the filament was circular) so I moved .05mm closer – a total of .2mm above the card pinch point and prints in the center of the bed are push-button. You’ll be doing the entire Z-offset calibration between bed swaps – especially with 22 screws holding it on.
For those used to calibrating 3D printers, this Z offset procedure shouldn’t be abnormal – the reason I am posting it is that this is the calibration video they provide. I followed these instructions and scratched the new magnetic print surface on both sides (around 1:40).