NOTE: This page describes how to create a working USB install drive using the latest official Apple macOS Sierra InstallOS.dmg (10.12.6) directly from Apple’s support site. It assumes you already know how to properly erase your USB drive using Disk Utility and have imaged USB drives before using the methods provided by Apple.
The following link to Apple’s support page contains the link to the macOS 10.12 Sierra installer (see Step 4).
After installing, I wanted to create a bootable USB installer but ran into this error:
sudo /Applications/Install\ macOS\ Sierra.app/Contents/Resources/createinstallmedia --volume /Volumes/ErasedUSBVolumeName --applicationpath /Applications/Install\ macOS\ Sierra.app

/Volumes/ErasedUSBVolumeName is not a valid volume mount point.
The problem here is isolated to the latest official macOS Sierra installer. The older installers (10.12 through 10.12.5) will create the USB installer without errors so we will use one of those to create the media, then overwrite the contents of the USB drive with the files from the latest InstallOS.dmg. It’s hacky, but it works and now I have a USB drive with Sierra 10.12.6.
While I can’t supply the .dmg installer, you just need to find any installer prior to 10.12.6 but I highly recommend that you verify the SHA1 with Peter Tripp’s awesome Apple Installer Checksums page.
Ok, so you went off and have returned with a macOS Sierra (10.12 to 10.12.5) installer. You also already erased your USB drive and have an OS X Extended (Journaled) drive with GUID Partition Map. Next, install the macOS installer app using this installer. You may need to be on an older release of macOS (I used El Capitan) for it to work, but when done, you will have the desired /Applications/Install macOS Sierra.app.
Using the command in the code-block above, create your USB bootable drive using the /Applications/Install macOS Sierra.app path. When that completes, you might want to reboot once and verify your Mac can see the bootable drive (just reboot/power off and hold the option key as it reboots/powers up). If you see your USB drive (labeled as Install macOS Sierra), you’re OK to proceed. Select your Mac disk and boot back into macOS.
Next, delete your /Applications/Install macOS Sierra.app. Remember – that’s the old installer. We’ll install the latest official installer next.
Using the link at the top of this article, download the official 10.12.6 InstallOS.dmg from Apple’s support site. Open InstallOS.dmg and it will present an InstallOS.pkg file. Open this file and walk through the installer steps. When complete, you will end up with … another /Applications/Install macOS Sierra.app.
In Finder, navigate to Applications and right/control-click the Install macOS Sierra.app and select “Show Package Contents.” This will present a “Contents” folder. Copy the entire folder (highlight with one click) using Command-C or Option-Click, Copy.
Next, navigate to the same path on your external USB drive. You will perform the same “Show Package Contents” on the Install macOS Sierra.app in that location. You will see the Contents folder.
Paste the folder and overwrite the Contents folder that is on your USB installer (Command-V or Option-Click, Paste).
That’s it. You’re done. Reboot your Mac, hold Option as it powers up and verify you can boot into the macOS installer. You now have a working macOS Sierra 10.12.6 bootable USB drive.
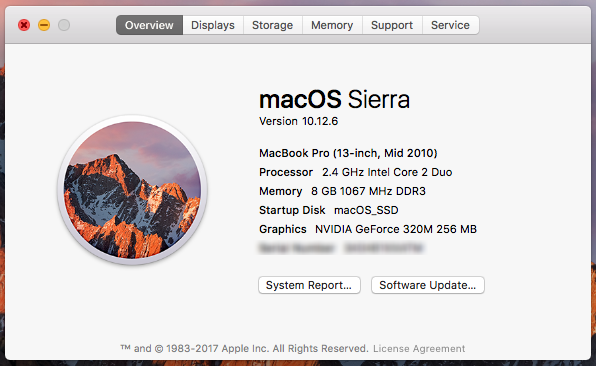
I wiped and re-installed my 2010 13″ MacBook Pro using the USB drive created during this process … end result?

